Following these five simple tips on how to hang pictures will help put the finishing touch on a well-designed room.
Always hang a picture or portrait at eye level. Hanging pictures above eye level takes the eye to the wall; creating a disconnection from the rest of the room’s décor’.
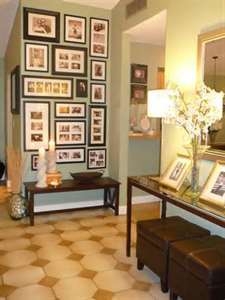
Group pictures and family portraits, either on a side table or on the wall. Photos scattered throughout makes a room look cluttered. Groupings of pictures or photos make a larger impact, and you can be sure that visitors will look at each one of them in this arrangement.
When grouping pictures or photos, the frames should always be in the same color, with various patterns and sizes. The same color of mat should also be used in all pictures. Using the same frame color showcases one large, cohesive art gallery.
Arrange groupings of pictures or photos on the floor prior to hanging on the wall. Be sure to keep the same distance of wall space around all four sides of the picture—two inches works well. You could make a wall template out of paper as a trial prior to hanging the actual picture. Not only does the template save on filling nail holes, it saves time.
When hanging just one picture, make sure the size of the picture fits the size of the wall. For example: A small picture gets swallowed up on a large wall. The same is true for a large picture on a small wall; it will overpower the wall and the room. If the wall is three feet or under, consider leaving the wall blank. Too many pictures in a room is visually confusing!
Written by: Julie Stone has twenty-five plus years in interior design experience and can help transform your home into a personalized space that you will enjoy living in. For more Design and Home Staging tips, visit my blog at juliestoneInteriors.com or contact me at 616-581-2759 or e-mail [email protected] for your next design project or home staging needs.


